

By Lane Reed, Regional Director, MuleHide
Originally published in the September 2026 edition of Metal Construction News
Main Facts
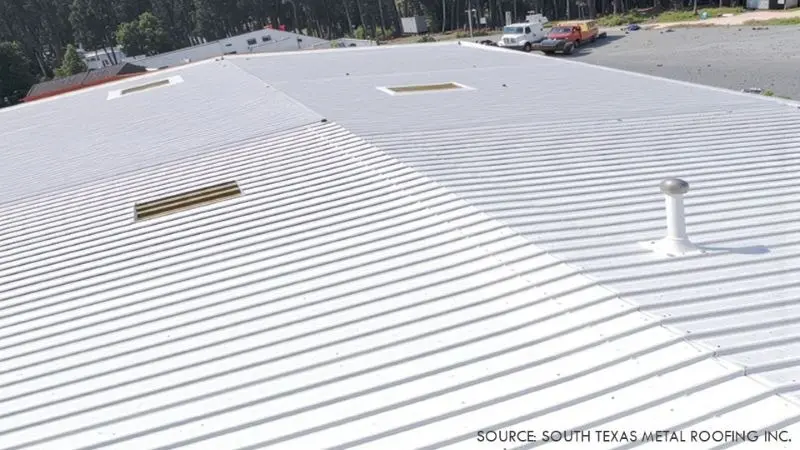
A professionally applied roof coating system can breathe new life into an aging metal roof, dramatically brightening its visual appeal, boosting thermal performance and energy efficiency, and delaying the necessity of a far costlier and structurally disruptive complete roof replacement for years to come. However, industry veterans emphasize that liquid coatings are not "miracles in a bucket."
Coatings cannot transform a structurally unsound roof into a sound one—such systems require full replacement. Nor will they magically erase pervasive leaks, chronic ponding water, or other underlying performance failures. These vulnerabilities must be systematically resolved before any coating is applied, or the newly restored system will inevitably experience premature failure. Furthermore, coating formulations are not "one-size-fits-all." The chosen chemical solution must be entirely compatible with the existing roof substrate and previous applications.
To ensure long-term performance, successful projects rely on three foundational steps: a meticulous visual inspection, targeted structural repairs, and a rigorous field adhesion test.
Chronology and Step-by-Step Execution
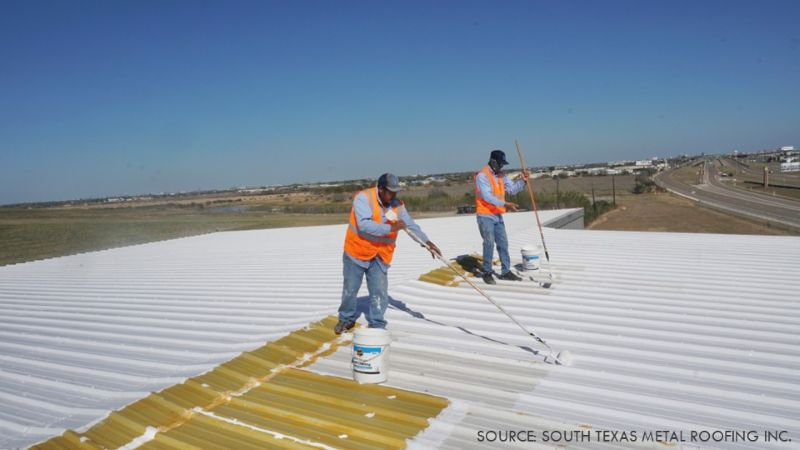
Implementing a successful metal roof restoration requires a disciplined, chronological approach. Skipping steps or rushing through preparation almost always leads to premature delamination and water infiltration.
Phase 1: The Initial Visual Inspection
Because no two commercial or industrial roofs are identical, walking the deck up close is non-negotiable.
- Debris Removal: Contractors must clear away all accumulated trash, leaves, and environmental debris to expose the raw roof panels and flashings.
- Surface Assessment: Crews look for peeling, cracking, or chalking of pre-existing coatings, rust patterns, and structural shifting.
Phase 2: Comprehensive Repairs and Remediation
Once the visual assessment identifies problem areas, crews must address all structural and weatherproofing flaws strictly adhering to manufacturer instructions.
- Sealing Vulnerabilities: Penetrations, curbs, skylights, and terminations must be meticulously sealed. Special attention is directed to transitions where roof panels meet parapet walls; because these two building components react differently to thermal expansion, contraction, and structural movement, their interface is a prime hotspot for leaks.
- Managing Equipment Vibration: Pitch pans must be installed around HVAC units and mechanical equipment to isolate vibrations that would otherwise break seals and create water infiltration pathways.
- Corrosion Remediation: For rusted panels that remain structurally sound, workers remove loose corrosion using a wire brush, wire wheel, or electric sander, clean and dry the surface, and apply a specialized rust-encapsulating primer. Severely degraded, structurally compromised panels must be completely cut out and replaced.
- Ponding Correction: Low-lying zones susceptible to standing water must be leveled using approved slope-correcting materials or surface-leveling compounds to establish positive drainage, sometimes supplemented by upgraded or additional roof drains.
Phase 3: The Field Adhesion Test
Long-term coating performance hinges entirely on interfacial bond strength. Before committing materials to the entire roof, applicators must conduct a standardized adhesion test. This phase requires a minimum curing window of four to five days before final pull-strength evaluations are performed using a calibrated fish scale.
Supporting Data and Technical Guidelines
Navigating chemical compatibility and bond strength requires adherence to strict technical standards. The nuances of coating chemistry dictate that guesswork can result in catastrophic system failure.
Chemical Compatibility Matrix
Factory-applied finishes and legacy coatings complicate material selection.
- Kynar 500® Finishes: Must be treated with specific, engineered primers before receiving an acrylic or silicone topcoat.
- Acrylic Legacy Roofs: Can be recoated using either acrylic or silicone products.
- Silicone Legacy Roofs: Restricted exclusively to recoating with silicone due to the inherently low surface energy of cured silicone, which rejects other chemistries.
Step-by-Step Adhesion Testing Protocol
According to low-slope manufacturing guidelines, technicians should execute the following protocol to verify bond integrity:
- Site Selection: Choose a representative 2-by-2-foot area on the roof deck.
- Solvent Cleaning: Scrub the test zone using a clean rag or bristle brush with a fast-flashing solvent (such as acetone, xylene, or mineral spirits) that evaporates entirely without leaving a soapy residue.
- Application Simulation: Prime a 1-by-1-foot section of the test area if the specification calls for a primer, applying both primer and finish coats at the exact millage rate planned for the full project.
- Fabric Reinforcement: Embed several strips of polyester-reinforced fabric (such as Tietex, roughly 1 by 12 inches) into the wet coating, leaving a 4-inch pull tab exposed. Brush the fabric thoroughly into the coating and apply a second coat to ensure complete saturation.
- Cure Time: Allow the test patch to cure completely for a minimum of four to five days.
- Pull Testing: Tie a knot in the loose end of each fabric strip, hook a calibrated fish scale to the knot, and pull straight up perpendicular to the roof surface.
- Evaluating Results: The target pull strength must measure at least 4 pounds per linear inch (pli) of fabric over a sound, dry substrate.
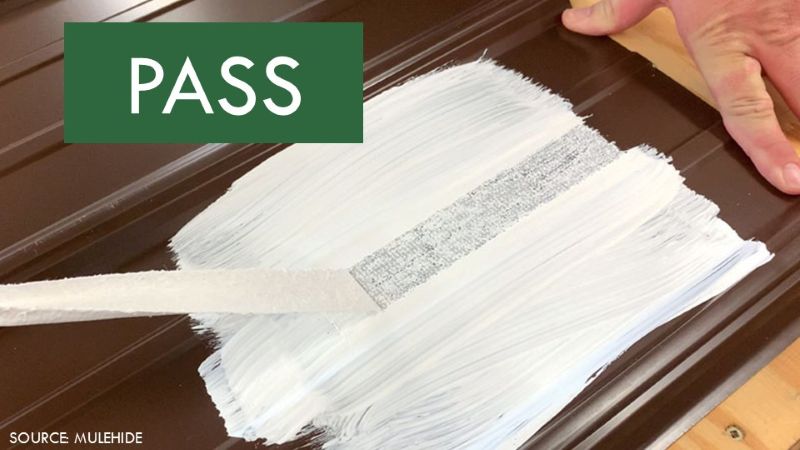
- Passing Result: The fabric separates from the coating matrix, leaving the coating securely bonded to the metal substrate.
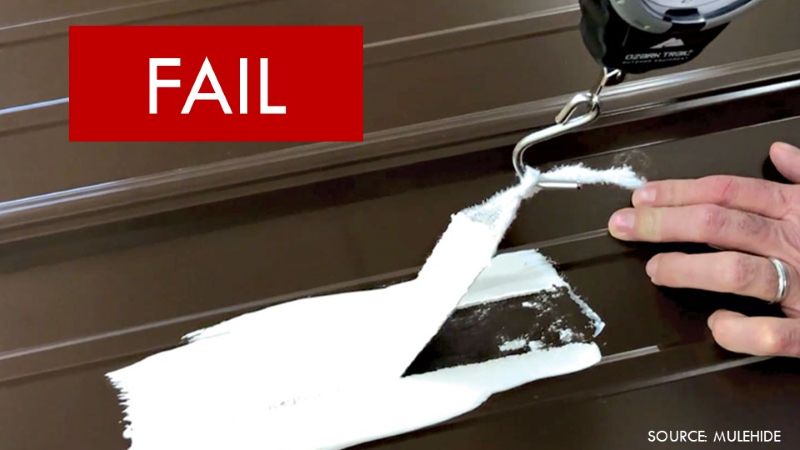
- Passing Failure Indicator: If the coating peels cleanly away from the metal substrate, the test fails, indicating inadequate surface prep, chemical incompatibility, or trapped subsurface moisture.
- Documentation: All adhesion tests must be photographically documented, capturing the cleaned substrate, wet application, and the exact peak resistance reading displayed on the fish scale.
Industry Perspectives and Professional Insights
Achieving maximum service life from a low-slope metal restoration demands rigorous quality control from both contractors and building owners.
Industry professionals emphasize that treating coatings as a universal cure-all is the single most common pitfall in commercial roofing. When underlying defects—such as encapsulated moisture, unsealed open seams, or compromised flashings—are ignored in favor of a quick cosmetic fix, the moisture trapped beneath an impermeable membrane expands during thermal cycling, leading to rapid blistering and delamination.
By framing roof restoration as an engineered system rather than a simple painting project, facility managers can protect their capital investments. Proper evaluation transforms an aging, energy-inefficient metal structure into a watertight, low-maintenance asset capable of delivering decades of dependable protection.
Implications for Facility Managers and Building Owners
For commercial real estate portfolios, adopting a proactive metal roof coating strategy carries profound financial and operational implications:
- Capital Expenditure Deferral: Complete tear-off and replacement of a commercial metal roof can drain capital budgets, disrupt tenant operations, and generate immense landfill waste. Coating extends the roof lifecycle at a fraction of the cost.
- Enhanced Energy Performance: White or highly reflective elastomeric coatings mitigate solar heat gain, lowering interior cooling loads and reducing peak summer electrical demand.
- Risk Mitigation: Strict adherence to inspection protocols, moisture checks, and adhesion tests protects building owners from latent defect liabilities, ensuring that warranties remain valid and enforceable.
- Sustainability Alignment: Restoring existing metal structures prevents tons of metal and insulation waste from entering waste streams, supporting corporate environmental, social, and governance (ESG) targets.
About the Author
Lane Reed is a regional director with low-slope roofing manufacturer MuleHide, leading the Southwest region. A 23-year veteran of the commercial roofing industry, he joined MuleHide in 2016, serving as a territory manager in Central, Southern, and West Texas for seven years. He began his career as a sales representative and estimator with a commercial roofing contractor before transitioning into commercial and residential roofing material sales as a manufacturer’s representative.
