


As temperatures climb and summer approaches, millions of homeowners and renters face the age-old dilemma of how to stay cool without committing to the massive financial undertaking of a central air conditioning system. For those who want powerful, targeted cooling without major home renovations, window air conditioners remain the gold standard of seasonal climate control.
While these heavy appliances can sometimes look intimidating sitting on a windowsill, installing a window AC unit is a straightforward DIY project once you understand the mechanics. In fact, seasoned users often master the routine quickly, removing the units at the end of autumn and reinstalling them when the mercury rises the following year.
However, success relies on careful preparation. Not all window frames are designed to accommodate a bulky appliance, and choosing the wrong size unit can lead to exorbitant energy bills or an uncomfortably warm room. This comprehensive guide walks you through the essential facts, step-by-step chronology, sizing data, critical safety implications, and expert tips to get your window AC installed safely and efficiently.
1. Main Facts: Understanding Window Air Conditioning
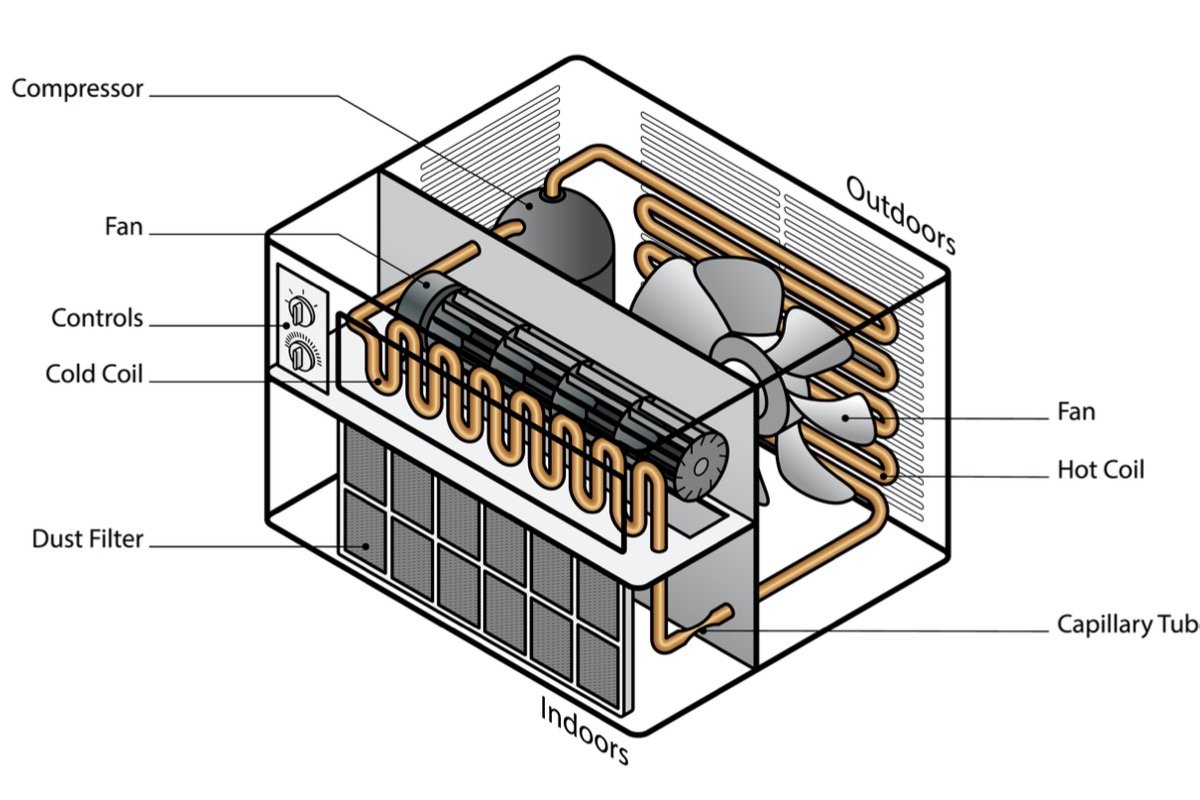
Window air conditioners offer an efficient, cost-effective alternative to central HVAC systems. Designed primarily to mount between the sash and the sill of single- or double-hung windows, these self-contained units pull in warm indoor air, pass it over refrigerant-chilled coils to extract heat and moisture, and vent the warmth outdoors. The remaining chilled air is then blown back into the living space via a built-in fan.
Portable vs. Window AC: Which Is Right for You?
Before diving into an installation, homeowners should evaluate whether a window unit is genuinely superior to a portable alternative:
- Window AC Units: These appliances mount directly into the window frame, utilizing sturdy hardware and accordion side panels to create a tight seal. They leave your floor space completely unobstructed and generally operate more efficiently because the heat-producing compressor sits outside the window casing.
- Portable AC Units: These are freestanding, indoor appliances that plug into standard electrical outlets and exhaust hot air through a flexible hose fitted into a window bracket. While they can be easily wheeled from room to room, they take up valuable floor space, tend to be louder, and generally operate less efficiently than window-mounted models.
2. Chronology: The 7-Step Installation Process
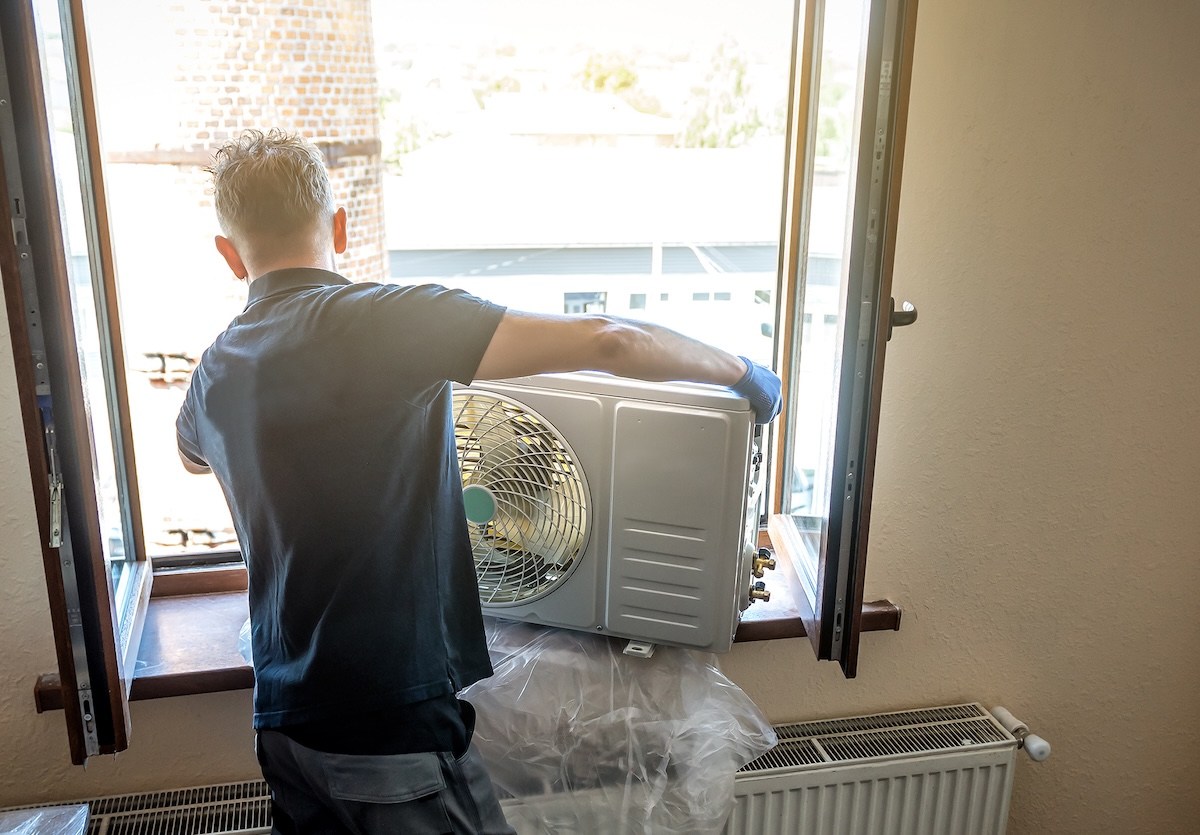
Once you have selected and purchased an appropriately sized unit, the installation process can typically be completed in under an hour. Always enlist a helper; managing a heavy appliance requires an extra pair of hands to ensure safety.
Step 1: Measure Your Window
Before purchasing or unboxing, measure the exact height and width of your window opening. Ensure you have at least 2 inches of clearance on either side of the housing so the accordion baffles can extend properly.
Step 2: Assemble the Unit Components
Unpack your air conditioner and follow the manufacturer’s instructions to attach any mounting rails, top/bottom flanges, or accordion-style side panels. Secure all components using the provided screws.
Step 3: Prepare the Window Frame
Open the window sash wide enough to comfortably accommodate the height of the air conditioner housing. Clear away any debris, dust, or old weatherstripping from the sill to ensure a flat, stable resting surface.
Step 4: Position the AC Unit in the Window
With your helper stabilizing the machine, lift the unit and rest its bottom flange squarely against the windowsill. Slowly lower the top window sash until its bottom rail rests firmly against the top flange of the air conditioner.
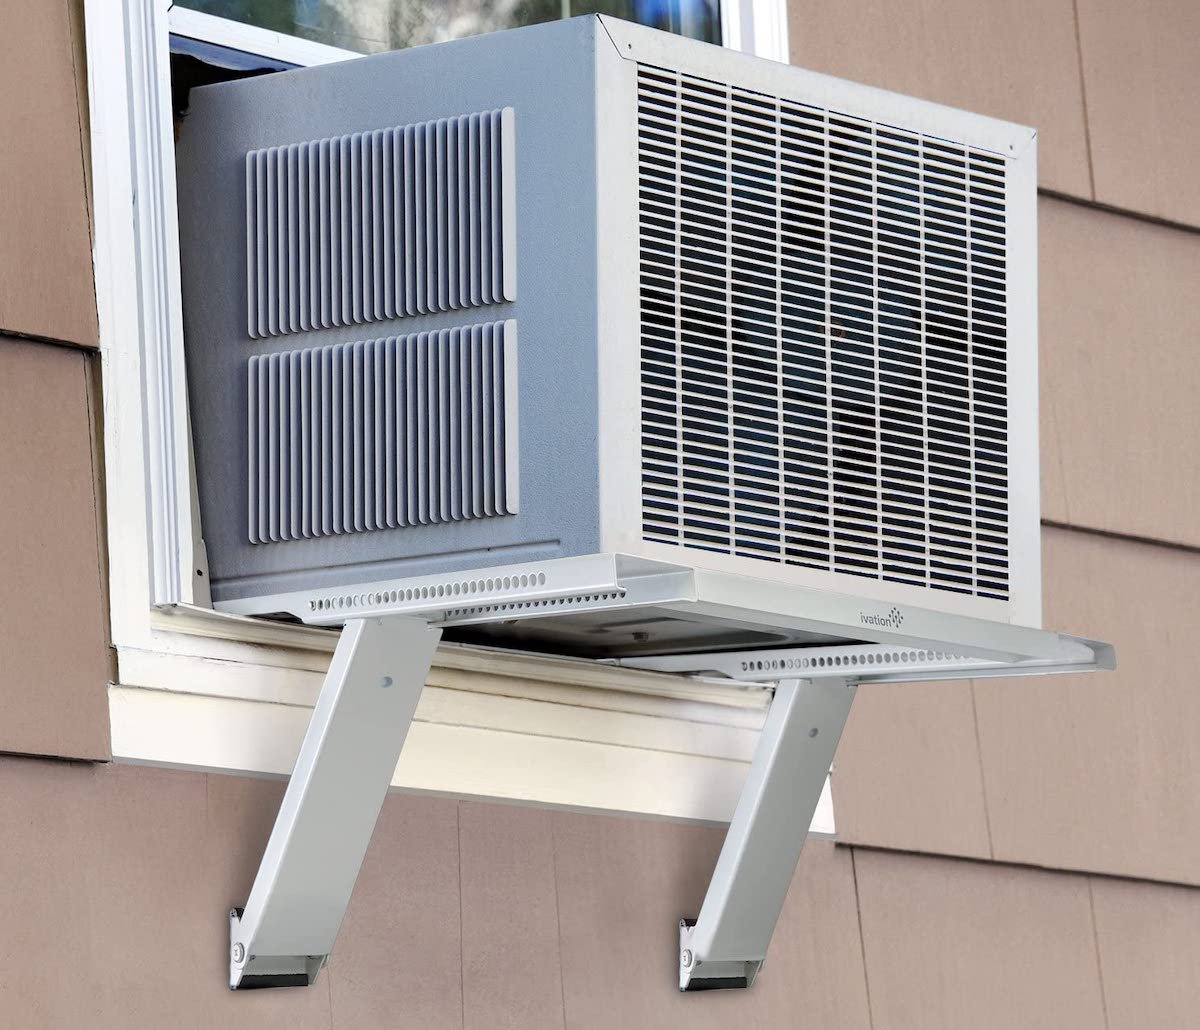
Note: Depending on local building codes, your window style, or the weight of the unit, you may need to install a dedicated exterior window AC support bracket to bear the load safely.
Step 5: Secure Angle Brackets and Frames
Locate the small angle brackets provided with your kit. These essential hardware pieces lock the upper and lower window sashes together, preventing them from slipping or allowing the window to be accidentally opened. Mark pilot holes, drill carefully, and tighten all screws.

Step 6: Extend and Seal the Side Panels
Pull the accordion-style side panels outward until they meet the interior window frame on both sides. Drill pilot holes into the window sash and secure the panels with screws. If any hairline gaps remain, apply foam weatherstripping for an airtight seal.
Step 7: Insulate the Upper Sash Gap
The final step addresses the horizontal gap created between the raised lower window sash and the glass panes of the top sash. Cut the provided foam insulating strip to the exact width of the window and press it snugly into this opening to prevent drafts and keep insects out.
3. Supporting Data: Sizing Your AC with BTUs
Choosing the correct cooling capacity is critical. An undersized unit will run constantly without cooling the space, while an oversized unit will cycle on and off too rapidly, failing to properly dehumidify the air and driving up your electric bill.
Cooling capacity is measured in British Thermal Units (BTUs), ranging from compact 5,000-BTU units for small bedrooms up to 20,000-BTU powerhouses for expansive living areas.
How to calculate your needs:
- Determine the room’s square footage by multiplying its length by its width.
- Multiply that square footage by 20 to 25 BTUs, which represents the standard energy required to cool one square foot of living space.
- Small Room (150 sq. ft.): Requires approximately 3,000 to 4,000 BTUs (though 5,000 BTUs is the standard minimum available market size).
- Medium Room (350 sq. ft.): Requires roughly 7,000 to 8,000 BTUs.
- Large Room (600 sq. ft.): Requires 12,000 to 14,000 BTUs.
Electrical Note: Most standard window units (under 15,000 BTUs) operate safely on a standard 120-volt, three-prong household outlet. Units exceeding 15,000 BTUs often require a dedicated 220-volt circuit.
4. Official Guidelines and Safety Implications
Safety authorities, municipal building inspectors, and manufacturers consistently emphasize that cutting corners during AC installation introduces severe risks.
- The Weight Hazard: Modern window units can easily weigh anywhere from 40 to over 60 pounds. Skipping the installation of support brackets or angle braces out of convenience is a major safety hazard. If an unsecured unit slips from a second-story window, it poses a catastrophic risk of injury or property damage to passersby.
- Security Vulnerabilities: An unbolted window AC unit can be pushed inward with minimal force, leaving ground-floor or accessible second-story windows vulnerable to break-ins. Using sash locks and angle brackets securely anchors the window shut around the appliance.
- Off-Season Storage: Leaving a window AC unit installed through freezing winter weather exposes internal components to moisture, ice, and snow accumulation, which can corrode parts and ruin the compressor. Experts advise carefully removing the unit in autumn, draining any residual condensation, and storing it upright in a dry basement or garage.
5. Frequently Asked Questions (FAQ)
Can you use a window air conditioner without a window?
No. Window air conditioners are engineered specifically to mount within a window frame. The unit relies on this separation to exhaust heat and moisture outdoors while keeping the cooled air circulating indoors.
Can you plug a window AC unit into a standard electrical outlet?
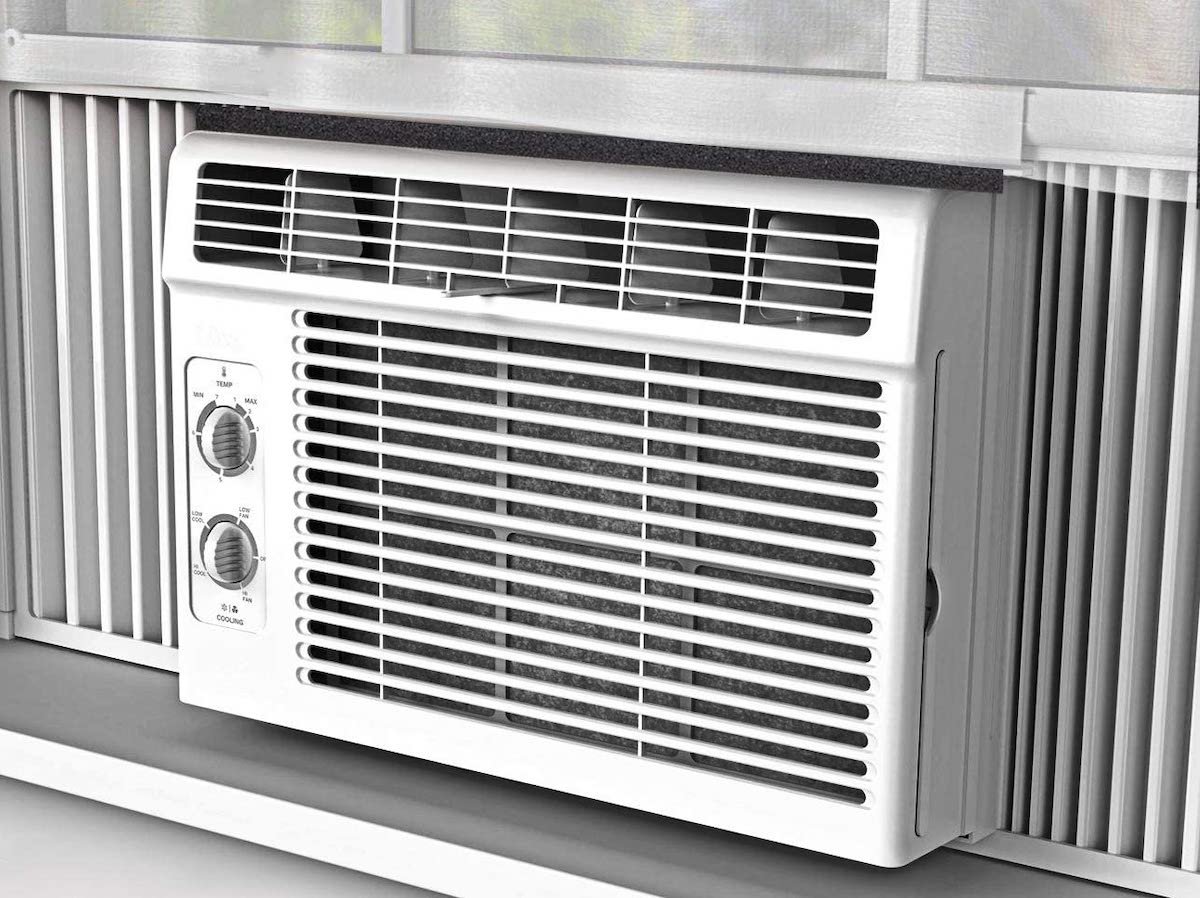
Yes. The vast majority of residential window units feature a standard three-prong plug compatible with typical 120-volt household outlets. Always plug high-draw appliances directly into a wall outlet rather than using extension cords, which can overheat and spark electrical fires.
Why do window air conditioners produce water, and where does it go?
As the unit pulls warm, humid air over its chilled evaporator coils, moisture condenses out of the air—much like condensation forming on a cold glass of ice water on a hot day. Most window units are designed to channel this condensation toward the outdoor coils, where it evaporates naturally or drips safely outside through a designated drainage port.
How do I maintain my unit during peak summer usage?
To keep your unit operating at peak efficiency, inspect and clean or replace the reusable air filter every two to four weeks. Clogged filters restrict airflow, forcing the compressor to work harder, consume more electricity, and wear out prematurely.
